Friday, October 6, 2023

Spain and Portugal 2023

The family took a great, 2 week trip to Spain and Portugal.  We did a road trip, and traveled to 9 destinations:

MAP

 September 21 – 24 – Pontevedra and Sanxenxo, Spain

The first leg of our trip traveled to the Galicia region of Spain so Kristen could compete in the 2023 World Triathlon Age Group Championships.  She qualified at US Nationals last year, and going to Worlds was always a bucket-list item for her, so we decided to make a family trip out of it.

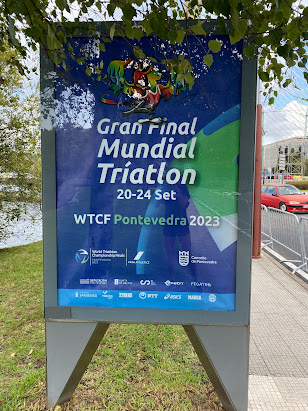
A sign advertising the championship in Pontevedra

After landing in Lisbon on the 21st, we immediately rented a car and drove about 2/3 of the way to Spain, stopping to sleep in Braga, Portugal, which is located in Portugal’s wine region.  All of Northwestern Portugal looks like Marin County.  Wine regions are wine regions, I guess.

We were exhausted and did not see any of the city, but we did have a nice dinner, and then a great continental breakfast that dead-on reminded us of Brazil.  This would be a theme of the trip – we spent so much time in Brazil in the past, the comparisons with Portugal were constant.

On the 22nd, we drove up to our beautiful rental house in Sanxenxo, Spain, which is a resort town about 30 minutes from the location of the triathlon, in Pontevedra, Spain.

The pool at our beautiful house in Sanxenxo, Spain

The night of the 22nd was the “Parade of Nations,” where all the triathlon participants paraded through the streets of Pontevedra.  We met up with Kristen’s brother Matt and his wife Meysel to watch the festivities, and then went back to the house and crashed.

Kristen decked out in her Team USA gear

The next few days were a flurry of activity – I’m not sure we appreciated the insane logistics that would go into the Worlds race.  Every day, Kristen had multiple things she had to take care of or do.  On the 22nd, we were also joined by Kristen’s sister Julie and her fiancĂ©e Travis, and all the siblings and in-laws were super helpful with the logistics.  This was a big deal on top of the exhaustion and jetlag.

We were able to do a few fun things during this preparation period, though.  Pontevedra is a wonderful little town with ancient buildings and lots of cute restaurants:

Soraya and Sylvia hamming it up in front of the 600 year old monastery in Pontevedra

And we were able to go to the beach in Sanxenxo.
Sylvia playing on the beach at Playa Montalvo near Sanxenxo, Spain

Finally, the day of the race came.  All 7 of us watched Kristen on every leg of the race, at as many points as we could.  Kristen’s expectations were that she would be happy to finish mid-pack of the ~50 racers in her age group.  But she ended up getting 6th place!  It was a really wonderful day.

Kristen on the bike leg

Soraya watching mommy come through on the run

A note on food at this point: we had almost no vegetables for days.  We were eating at a variety of restaurants, and most of the food was pretty good, but were almost never served vegetables (other than potatoes).  Vegetables and fruit did not come with meals, they were not offered as sides, and were generally not available beyond a basic salad.  The fruit we bought at a local market was mediocre.  Almost all meals were just carbs and protein.  We didn’t understand what was going on.  After 3-4 days of this, I started making it a point to eat exclusively salad every day for lunch – whatever salad was on offer.  Julie and Travis (who had just spend 4 weeks traveling through other parts of Europe) said this was pretty common elsewhere.

September 25-27: Braga, Obidos, Nazare

We left Sanxenxo on the 25th and said goodbye to Matt and Meysel, who were headed for Madrid.  Julie and Travis would stick with us for the next couple parts of the trip.

First, we stopped in Braga for lunch.  We ate at the famous restaurant A Brasilera, which, despite the name, did not serve Brazilian food.  They did, however, serve vegetables.

The girls playing on the BRAGA sign

Braga is a really nice town – it seemed large enough to have a variety of cultural elements, but still felt like a small European town, with winding streets and beautiful old buildings.  And not many tourists.

Walking toward the central square in Braga, Portugal

From Braga, we proceeded on to our next accommodation, just outside Peniche.  We stayed in a 2 bedroom, 1 bathroom windmill!

100 year old windmill converted into an AirBnB

The windmill was a little cramped and dark, but the kids (and I) thought it was super cool.  You could even see the old gearing, which they had partially left in place, and partially turned into furniture.

The exposed mechanicals of the windmill in one bedroom

During this part of the trip, we first visited Obidos castle, which was like the archetype of a cool medieval castle and walled city.  And the best part was that Obidos allows you to walk on the walls of the city.  The entire walk is about a mile long, along a narrow walkway (that soldiers presumably patrolled 500 years ago) with significant height exposure.  This is how we found out that Soraya is not afraid of heights.  I LOVED this part of the trip, and it was one of the most memorable things we did.

Walking the walls of Obidos

On the Obidos wall with a view of the main castle

The girls posing at one of the windows cut into the Obidos wall

After Obidos, we went to the famous Nazare beach, where the largest waves in the world sometimes swell up.  We spent a bit of time on the main town beach, playing in the sand, though we were not able to go in the water because the surf was so high (the waves were around 6-8ft).

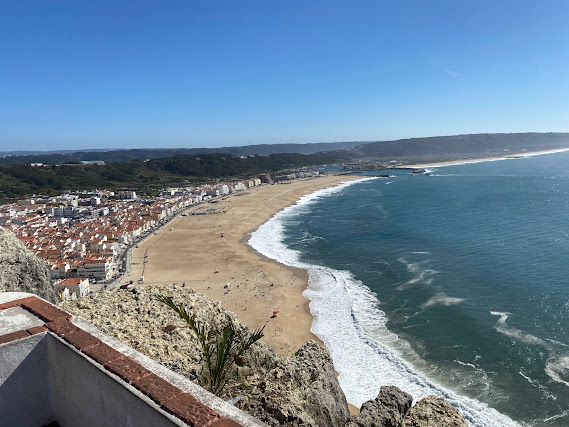
Looking down onto Praia da Nazare

Then afterward, we drove up to see Praia do Norte, where the huge waves come.  This was a tourist trap and probably not worth the trip unless the waves had been really huge that day, or if surfers were out.

September 27-29: Evora

From the windmill, we drove East to the small town of Evora.  As we drove East, the temperature rose, and the land turned to desert.  Eastern Portugal looks like the Sierra foothills (specifically Amador county), with dry landscapes, strewn-about boulders, and valley oak-looking trees (which turned out to be cork trees, a close relative).

On the way, we stopped to check out some Neolithic monuments.  The primary Stonehenge-like area, called Cromeleque dos Almendres, was closed for restoration, but we got to see a cool, 12ft tall ceremonial stone built by humans about 8,000 years ago.

The Menir dos Almendres

The town of Evora itself is an absolutely charming, magical village.  The entire town is surrounded by a crenelated wall, and inside is a maze of cobbled streets and medieval buildings.

Lunchtime in Evora

The Roman ruins at the top of Evora

It was like the medieval Ann Arbor or Madison – a cute college town with a lot of energy.  Prices were low and tourists were relatively few.  The food was great, there were Roman ruins, and we were able to have some downtime with the kids, stopping at the local beautiful library, and going to a local playground.  We also visited the famous Capela dos Ossos, a memento mori chapel built from the bones of 5000 people.  The girls thought it was pretty cool.  Julie and Travis even watched the kids one night so Kristen and I could go on a date to a nice restaurant!  Evora felt like the most “authentic” Portugal experience we had.

Capela dos Ossos

The girls loved looking at the old bells at churches - looking up at the belltower at the Se de Evora

A note on language: at the point in the trip, we weren’t sure of what to make of the language aspect.  Kristen and I both speak good Spanish and passable Portuguese.  And we had read and assumed that most people would appreciate us speaking the local language.  But we were typically met with a mixed response.  Almost everywhere in Portugal, service workers speak English, usually better than we speak Portuguese, and they seemed to sometimes get annoyed that we were trying to converse in Portuguese.  But, we insisted anyway, and were starting to get some of our vocab back from the Brazil days by this point in the trip.  So I’m not really sure what the best thing to do here was, since we were potentially making people’s jobs harder, but practicing Portuguese is what we did.  To the point that once when I responded to a waiter in English, Sylvia asked me why I did that.

September 29-Oct 2: The Algarve

From Evora, we said goodbye to Julie and Travis, and drove down to the beach region of Portugal, called the Algarve.  The Algarve is known for its picturesque limestone cliffs that line the sea, and create tiny beaches that dot the coast, full of caves and other nooks and crannies.

Looking at Ponta da Piedade outside Lagos, Portugal

Looking down onto Praia das Fontainhas outside Carvoeiro, Portugal

The Algarve region is like 95% tourists.  Lots of Americans, Brits, and Germans.  Most of our meals were eaten at cute beachside restaurants that all had the exact same, lowest-common-denominator menu of hamburgers, egg dishes, and sandwiches.

The surf was pretty high when we were in the area, and swimming was prohibited the first day we were there.  We had intended to rent Kayaks to paddle out to Benagil cave, but that looked like it wasn’t going to happen, so we decided to go beach-hopping.

We ended up going to several wonderful beaches, where the girls had a great time jumping in the waves, building sandcastles, and playing make-believe.  It was a nice, relaxing few days on the shore.

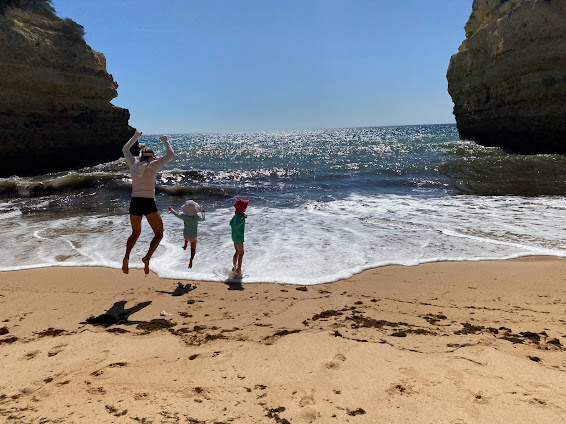
Playing at Praia da Marinha

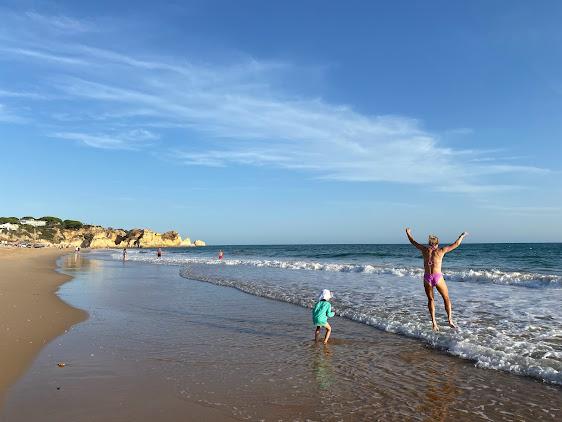
Jumping the waves at Praia do Fontainha

Jumping the waves at Praia dos Tres Irmaos

Oct 2-3: Lisbon

On Oct 2, we left The Algarve and headed for Lisbon.  To this point, we had deliberately avoided Portugal’s major cities (Lisbon and Porto), because we thought trying to go on walking tours to see architectural points of interest was probably not going to go great with a 3 and a 5 year old.  Kristen and I also just aren’t that enamored of big cities for whatever reason.  But we spent most of the day touring around Lisbon with the kids, which was about enough.

We took the famous Tram 28 through the city, and then walked through a few neighborhoods, stopping for dinner in the Chiado neighborhood.

All of us on board Tram 28

Lisbon looks like a more organized, older version of Sao Paulo.  It has a very similar feel.  Lisbon is also far more cosmopolitan than the other provincial places we visited – you could get more than traditional Portuguese food, and there seemed to be a melting pot of people and things.  We probably could have spent another half-day to full day exploring Lisbon, but given all the other things we wanted to see and do, I think a half day of walking around was plenty.

Walking to dinner in the Chiado neighborhood in Lisbon

Interestingly, the people in Lisbon seemed happier to talk with us in Portuguese than elsewhere.

And so ended our trip to Portugal and Spain.  It was a great time with the family, Kristen’s first visit to continental Europe, and a new cultural experience for the kids!
Monday, May 22, 2017

24 Hours of Lemons–Thunderhill 2017

Yugo 1

The 1988 Yugo GV

IMG_20170519_105245567_HDR

Me in the fire suit

Team

Team Yugo2L at Thunderhill: John, me, Bill, and Justin

So I guess I’m a racecar driver now.  Sort of.

The 24 Hours of LeMons is an endurance race for cars that cost less than $500.  It’s a play on words to make fun of the hoity-toity 24 Hours of LeMans race in France, while poking fun at car culture in general.  Basically you take the worst car you can find, and make it go around a race track for 16 hours.  Driving hard for 16 hours even in a new car is likely to break something, let alone a junkyard special.  Half the point is to heroically fix stuff when it breaks.  Which means it combines two of my favorite things – driving on a race track, and fixing things.  It is totally awesome.

There are really two types of team at a Lemons race: teams that are trying to win, and teams that bring the worst car they can find on purpose.  My friend John asked me if I wanted to drive with the second kind of team, which would be bringing a 1988 Yugo – possibly the worst car ever made.

A sampling of other cars at the race: 1986 Olds Cutlass, 70s VW Vanagon, a Honda Del Sol with the body panels of an El Camino – called the Del Camino, 1989 Volvo station wagon, 1956 Nash Metropolitan, 1977 Volvo 244, 1976 Ford Pinto, 1963 Studebaker Avanti, 1974 Lotus Elite, and a bunch of Porsche 914/944s, BMW E30s, and Miatas.

Olds 1986 Cutlass Supreme

Oldsmobile Cutlass Supreme race car dressed as a horse

VW Vanagon

VW Vanagon racecar with Italian police theme.  These guys blew up their engine on test day and had to do an entire engine swap the first night.

We showed up on Friday morning to get in a day of testing and get acquainted with the car.  My first 30 minute session on track was terrifying.  I felt uncomfortable in the cockpit (Bill, the owner of the Yugo, has longer legs and shorter arms, so I could never get the seat in a great driving position for me), the car felt a bit sloppy, the brakes barely worked, it was loud and hot, and it understeered like nothing I have ever been in.  After that first session, I was unsure I’d make it through the weekend.

Seriously, the front tires started sliding at probably 20mph.  There was no way to drive around the track without the front tires sliding to some degree.  It was horrifying.  After the first session, I asked John and Bill how the hell I was supposed to drive the car when it was sliding so much.  John said – “just mash the throttle when it starts to slide.  It’ll still slide, but it’ll also go forward.”  This was a serious WTF revelation for me.  I’m so used to controlling understeer in my Miata by braking or lifting off the throttle – this was totally the opposite.  But I went back out there and HALLELUJAH! it worked.  Turns out you can control the arc of a turn in this car by using the throttle to bring the nose around a turn, even while it’s sliding.  So you are literally reverse-drifting every single corner.  It’s a blast!

It slides like this for two reasons.  Number 1 is that the Yugo has got to be the most front-heavy car I’ve ever been in.  When we jacked it up from the middle, the rear wheels lifted off the ground.  As far as I can tell, the rear wheels are mostly for show.  Whenever I imagine the weight balance of the Yugo, I think of a Segway with a swivel caster mounted behind it:

Yugo Weight balance

Diagram of the Yugo’s weight balance

Adding to this, the Yugo is known to be one of the least durable cars of all time.  When Bill bought it, the frame was literally ripping apart.  I think it’s probably made mostly of tin foil folded over on itself.  Or whatever was available that day at the factory.

Because of the durability issues, Bill has to use the worst and slipperiest tires he can find, which is reason #2 for the sliding.  Sticky tires would mean more grip, and more grip would mean more force on the frame.  More force on the frame would mean parts ripping off the car.

Tires

This tire was pretty new when it went on the car at the beginning of Sunday

Honestly though, it’s not that slow.  It accelerates about as fast as a first-gen Miata.

All in all, the Yugo is a perfect Lemons car.

The first day of racing, I was nervous.  John did the first stint.  The right rear wheel tore a brake line a few laps in, so John had to pit.  We couldn’t find a spare line, so we did our first real hooptie fix of the weekend – we blocked off the right rear brake entirely, and raced with 3 brakes.  Guess what: the brake feel got BETTER.  Like I said, I think the rear wheels are mostly for show.

Brake tee

Rear brake splitter.  The bolt on the right is where a brake line is supposed to be

The car ran as well as can be expected for the rest of the day, including during my stint.  And by “as well as can be expected”, I mean for a Yugo.  I had a 30 minute period where the track was under caution and we were driving slow.  The car started to overheat during that time, because we weren’t going fast enough to pass air over the radiator.  The carburetor starves for fuel whenever you’re going up a hill or around a hard corner – built in traction control!  And later that first day, Bill was driving, and we noticed a weird noise when he came in for gas.  Turns out the front brake pads were completely gone and he was out there braking with steel-on-steel.

Brakes

Utterly destroyed front brake pad on the left, new pad on the right

But the car ran, and ran, and ran.  We were in 5th place in the "C” class (cars that are not expected to finish the race), with slow but respectable lap times!

That evening, we fixed the issues with the car as best we could – we found another brake line, we changed out the brake pads and bled the brakes, and we checked over the suspension and frame for signs of failure.

Oh, and John and I also devised a way to keep it from overheating – we figured we should block off the headlight holes to get better airflow over the radiator.  In order to do that, we had to build a “cold air intake” out of cardboard and duct tape.  Hooptie fix #2!

Cold air intake

Custom made cold air intake

On the second day of racing, I was feeling good.  Justin did a 1hr turn first thing that morning, and then I was up for 2 hours.  I did my best laps of the weekend, running about the same pace as John and Bill (which made me feel proud – perhaps I’ve learned to drive if I can get the car around the track as quickly as those guys!).

Me driving the Yugo

By the end of my stint, the handling was starting to feel kind of loose.  Sometimes under throttle and braking, the car would pull to one side or the other.  I figured it was a degenerative suspension bushing issue (which the car had last year), and I backed off the pace to preserve the car for John and Bill.  John did his turn, and ran some really fast laps despite the handling.  Then Bill did about 10 laps and had to come in because the car was getting way too loose to drive safely.  He said it would basically change lanes if he used the throttle or brakes.

We inspected the car, and the suspension looked fine.  Weird.  But Bill had noticed that whenever he hit the throttle, the shift lever in the cabin would bang back and forth.  So he checked the engine mounts. One was completely severed, and he could rock the engine back and forth with almost no force.

On a front wheel drive car, if the engine is moving around, it pushes on the drive shafts that connect to the wheels.  Which means that if you accelerate or brake, the engine is going to push on the wheels in one direction or the other – exactly the symptoms we had on track.  Apparently the mount was going bad when I was driving, and completely failed while Bill was driving.

As John said, “sometimes the car has to remind you it’s a Yugo.”

But at the end of the second day, we’d completed a respectable 145 laps.  The car ran for 15.25 of 16 total hours.  Which is way better than some of the cars that should have been way ahead of us, like a cheaty 2006 Pontiac GTO someone bought for $500 after it was in a fire, or a bunch of 80s BMWs and Porsches.  We ended up in 4th in C class!

This was such a fun weekend.  What a blast.  Camping, driving cars, fixing broken stuff.  Doesn’t get better than that.  And the atmosphere was great, too.  Nobody seemed to be taking it too seriously, even the guys in the pit next to us that came in 2nd place overall by a hair.  And the best part was the focus on safety – Lemons is way safer than a normal car race.  The organizers emphasize safety by penalizing dangerous driving, and the fact that it’s an endurance race makes preservation of the car important, so very few teams drive aggressively.

I can’t wait to do this again.

Friday, October 2, 2015

My first Track Day/HPDE

GBMA3954

Running laps at Laguna Seca.  Photo by gotbluemilk.com

I’ll preface this post by saying very clearly that I am currently sitting atop Mount Stupid when it comes to driving a car on a track:

Mount Stupid Cut

Via smbc-comics.com

I have lots of hobbies, and have passed through the Mount Stupid phase of knowledge many times.  Hopefully I’m learning to identify when I’ve gained enough knowledge to be dangerous, but probably not.

Anyway, about 3 months ago, Kristen’s sister Julie got a Subaru BRZ, which is a rear-wheel drive sports car.  She left it at our house for a week, and naturally I drove it around a bit.  IT WAS AWESOME.  I’d sort of forgotten why sports cars exist until then.  I can now say there was a sort of automotive dark ages in my life, between say 22 and 32.  The BRZ appears to have brought in the age of enlightenment.

I asked Julie if I could borrow her car to do what is called a “track day,” which is where you bring your own car to a race track and learn to drive it there (NOT in a race setting, but a controlled instructional setting with lots of safety rules).  I think she thought I was joking.  Then as I was reading about track days, Kristen and I started casually talking about maybe getting a used sports car.  Fast forward a couple months, and now we are the proud owners of a 2007 Mazda MX-5 Miata.  So my Age of Automotive Enlightenment came in an odd form – I grew up lusting after 500hp muscle cars, and now I own a 135hp lightweight Japanese roadster that is stereotypically driven by female hairdressers.  But all my research suggested that the Miata is absolutely the best bang-for-the-buck driving experience you can get.  So naturally, the Miata went to the track.

The track day took place at Laguna Seca near Monterrey, which is a very famous track.  I studied Youtube videos of people driving the track, and made flashcards to memorize the turn numbers layouts beforehand.  Maybe it was overkill, but it gave me some confidence and I knew exactly what to expect going in.

The day was organized through a group called Hooked on Driving, which I chose because they seem to have the heaviest emphasis on safety.

DSC00876

The Miata.  We got to choose our own #s, so of course I chose 469, which is the # of the robotics team I helped found in 1999

The day started with lectures on safety, flags, and general car handling stuff.  Then we went out to the Skid Pad (basically a big open parking lot) for handling drills.  There was a figure 8, and we were told to purposely over-drive the car.  The told us to try and get the car to understeer (where the front wheels lose traction – you turn the wheel and the car keeps going straight), and oversteer (where the rear wheels lose traction – you fishtail and potentially spin).

This is where things got interesting, and where I’m going to begin to opine from atop Mount Stupid.  My car was one of the cheapest cars in the novice run group by almost an order of magnitude.  There were Corvette ZO6s, Lotus Elises, Porsche Caymans and Boxsters, Audi R8s, a vintage Shelby Roadster, a Mercedes Benz S63 AMG, and a damn Ferrari.  Perhaps I was projecting, but the guys in the expensive cars didn’t seem to want to push them too hard on the skid pad.  But I can say honestly I did not give a sh*t – I came to the track to learn to drive, and bought a car I knew I wouldn’t have to baby.  I spun my car twice (on purpose), and lost control in every way possible.  It was awesome, and I couldn’t stop smiling.

DSC00881

Ferrari, Porsche 911, and Shelby Roadster in the background

Anyway, after handling drills, we had another lecture, and then it was time for the track.  The novice group is paired up into teams of 2 people + 1 instructor.  The instructor sits in one of the 2 cars every time out, and we all had radios to communicate with each other.  My instructor for the day was John Connelly, who also drives a Miata (though his is track-prepped).  They try and match the coach with students based on what kind of cars they drive, so the coach can give more precise instruction.  In my case, John was awesome – I learned a ton, and since he knows what a Miata can do, I knew I could trust him when he’d tell me things like “full throttle through here.”

GBMA3749

John instructing me during our first track session.  Photo by gotbluemilk.com

Our first 20 minute session on the track was introductory in nature.  We went fairly slow at first and sped up toward the end as we got used to the corners.  The laps felt pretty fast to me by the end of the session.

Afterward, John offered to take me for a ride in his Miata, which of course I was excited to do.

I thought we were going pretty fast in our introductory laps.  We were not.  John showed me what fast actually looks like.  He braked hard and late.  He held the car at the edge of its grip through a turn, and I could feel him adjust throttle and steering input to keep the car at the edge.  The car was subtly slipping sideways, in a controlled manner, through corner exit.  I now know what car magazines mean when they say a car is “neutral.”

The laps with John changed my perspective on what it means to drive on a track.  During our next session, I tried braking harder and later.  It worked.  I tried to feed on the throttle while unwinding the steering after the corner apex.  That worked, too.  All of John’s comments for the rest of the day made a lot more sense.  I got faster and more confident as the day went on.  I think I’m learning to drive!

GBMA4714

Us in the corkscrew (Turn 8) with a Lotus Elise.  Photo by gotbluemilk.com

The rest of my comments here are going to center on what I saw at the track – the impressions of an absolute novice.  Again, atop Mount Stupid.

Another term for a track day is HPDE, which can stand for High Performance Driving Education, or High Performance Driving Experience.  My impression is that some people came more for the education, and some came more for the experience (of going really really fast).

Now, the whole point of the day is to have fun.  That might mean learning, and that might mean opening up the throttle on your 600hp beast as much as possible.  I begrudge nobody their source of fun.  However, a few of these guys were doing things that the other drivers thought were a little aggressive, and at our de-brief sessions they were given talking-tos by the coaches, who seemed to take that kind of thing pretty seriously.

GBMA5344

Laying down all 135 horses on the front straightaway.  Photo by gotbluemilk.com

There also seemed to be a lot to learn from many of the drivers in my novice group doing weird stuff on the track.  There is only one way to go fast around a track in a Miata, which is to take a good line and drive the absolute piss out of it.  The Miata loves this sort of treatment, and this is why it is such a popular track car.  John was clear about that, and I tried very hard to follow his instruction on braking, apex location, throttle level, and track-out.  It is a “momentum car,” meaning there is not much horsepower to cover up any mistakes.  That said, I saw many of the high-horsepower cars taking weird, sub-optimal lines, braking early, apexing early, and generally doing things that would slow my Miata to a crawl.  People don’t really post Youtube videos of themselves taking a poor line around a track, so watching the Experience people after they passed me actually seemed to be a great learning tool for a novice like myself.

Regardless, it was an absolute blast.  Learning a new skill is so much fun, and doing it in a controlled environment while going fast makes it even better.  Driving a sports car on a track is a kind of lifetime bucket list thing to do, and I’m hoping I get to do it a whole lot more.

To conclude, the track day was pretty much the most awesome thing ever.  It’s all I’ve been talking about for the past several days.  I’d like to do maybe 4-5 track days per year, and I think I may have convinced both my dad and Kristen to come out and learn how to drive as well!

Tuesday, September 8, 2015

Bear Lakes Backpacking Trip

We try to go on one “difficult” backpacking trip per year.  This year we did the Bear Lakes loop, with our old friend Vicky and new friend Laurel.  Kristen fondly remembers doing this trip with Steve, Matt, and Karoline when she was 16, and has been talking about it ever since I met her.

For reference, we are using a version of the trip description from the Sierra South book, by Morey & White.  We are hoping this post will fill in some gaps in detail, and set expectations for anyone hoping to do this trip in the future.

Day 0: Driving in

OHVRoad1

Bear Diversion Dam OHV road – an easy section

Car_1

Our Expedition at the end of the Bear Diversion Dam OHV road

The trip starts at the end of the Bear Diversion Dam OHV road, which is a 2.5-mile off-road trail.  Basically it’s an unmaintained double track that goes over granite slabs, and has some loose, steep sections and lots of big rocks.  In the Sierra South book, they say that only high-clearance vehicles can make it over the road, and that the “typical urban SUV” cannot pass the road.  When Kristen did the hike 13 years ago, they parked at the start of the road and hiked the whole thing.  We wanted to drive the road but were a bit worried, since our Expedition is somewhere between a pickup truck and an “urban SUV.”

As it turns out, the book is completely wrong about this one.  Our truck was fine.  We did not see any other modified or raised trucks at the dam – it was mostly pickups, large SUVs (Suburbans, etc.), and there was even a Honda CRV that passed the road.  I think if you have a basic understanding of how to take a line, what types of angles (up/down/high-center) might be dangerous for your car, and are willing to move a few rocks around, it’s not a big deal.  Put it in 4-high, turn off the traction control, and away you go.  It took about 45 minutes on the way in, and about 30 on the way out since we knew what we were dealing with.

Anyway, we arrived at the dam around 5pm, and set up camp.  I went fishing in the reservoir, and caught a large brown trout!

Day 1 – Bear Diversion Dam to Hilgard Meadow (~10 miles, ~2,500ft ascent)

KristenJeff_River1

Us on the way up Bear Creek

HilgardMeadow1

Getting water at the incredible Hilgard Meadow

Day 1 was an access day.  We were packed up and off by 9:30am.  The first part of the hike took us up the Bear Creek drainage, and was mostly wooded, though with great views of the Bear Creek river.  The river was flowing modestly and beautifully over granite slabs.

After 6.5 miles, the trail hits the JMT/PCT, which is more or less the superhighway of the Sierra.  It is impeccably maintained and marked.  We saw a few of what appeared to be through-hikers.  By this point I was feeling the altitude, and we stopped for lunch to re-charge.  I took diamox, which is a miracle drug if you get altitude sickness like I do, but it doesn’t help you get up the elevation – it just takes away the migraine and nausea so you can function.

After roughly 2 miles on the JMT, we took the turnoff onto the Italy Pass trail.  After a bit of a climb over some slabs, and a bit of route-finding as the trail became faint, we made it to Hilgard Meadow.

Hilgard Meadow is really incredible.  A stream meanders through the flat grassy expanse, and the area is framed by several bare granite peaks, including Mount Hilgard.  I can’t even imagine what it is like in the early Summer when the wildflowers are out.

We camped just beyond the meadow, arriving aroung 3:30pm (so ~6ish hours on trail), and had an extremely cold night – it got down below freezing and we had ice on our tent the next morning.

Day 2: Hilgard Meadow to Vee Lake (~10 miles, ~2600ft ascent)

Hilgard_Meadow_FromAbove1

Hilgard Meadow as seen from the ascent to Lake Italy

Italy_to_Jumble1

The path from Lake Italy to Jumble Lake – a disaster of scree the entire way

Group_BearLakes_View1b

The four of us at the saddle above the Bear Lakes

VeeLake_Sunset1

Vee Lake at sunset

Alright, here we go.  Thinking about this day still makes me hurt.  We were on trail from 9:30am until 7:30pm.  It took 10 hours to go 10 miles, so roughly 1 mph.  We are all very fit – the terrain is what killed us.

For anyone who happens to stumble across this blog, I am going to lay out the correct way to do this.  Because we did not do it correctly.  We . . . let’s say . . . learned a lot about cross-country route finding above 12,000ft.

First off, everything from Hilgard Meadow to the saddle above Jumble Lake is a complete disaster of granite debris.  Where Yosemite Park granite is smooth and flowing, Muir Wilderness granite is broken and otherworldly.  The route requires a significant amount of boulder-hopping and hand-over-hand scrambling, through talus fields, loose scree, and granite boulder moraines.  Which is way harder than it sounds with a full pack on your back.

Hilgard to Pass Above Italy 1

The CORRECT route to get up and over the saddle

From Hilgard meadow, follow the trail along the easy, flat section until you begin to climb.  The trail quickly turns to granite talus, and you’ll be hopping boulders on the way up the river valley until you’re even with Teddy Bear Lake.  Make sure and take a look back at Hilgard Meadow – the river valley is very beautiful from the trail.  The critical point will be where to cross from the left side of the river to the right side (West to East).  We crossed too late, and ended up doing far more boulder hopping than is necessary.  Instead, cross the river at the nice flat-ish section before the final ascent to Lake Italy, not too far past the Teddy Bear Lake inlet.  The trail is much easier on the right hand (East) side of the river.  We probably wasted 30-45 minutes and a good amount of safety on the wrong side.

Next big thing – I’m pretty sure there is a trail somewhere about 30-50 vertical feet above Lake Italy.  We stayed down by the shore, which is again a disaster of boulders, requiring tedious negotiation.  We did not arrive at the far side of Lake Italy for lunch until something like 2pm.

Lake Italy itself is totally otherworldly.  It is framed in nearly 360 degrees by high, bare peaks.  Broken granite lines its shores, and the buff mountainous landscape in the near distance is foreboding.  It is a place that looks as rugged as can be.  There are no trees, and very few plants.  Everywhere is rock.  It is at the same time beautiful, strange, lonely, and peaceful.

From Lake Italy, there isn’t much of a trail.  You go up the right side of the drainage coming down from Jumble, which is difficult to identify.  They key thing here is to cross to the left (North) side of the lake early.  As soon as you get up the initial slope from Lake Italy, cross the drainage and head for the left margin of Jumble Lake.  Do not get lulled into thinking you can make easy progress on the right (South) side of the lake.  There is a nice, flat, mostly boulder-free area that leads up to the lake’s moraine on the South side.  The moraine is pretty, but looked impossible to cross.  This is a dead end.

Now is where it gets tricky.  Follow the faint cairns up the slope from Jumble Lake, heading toward Italy Pass.  The route gets very steep as it approaches a bench (which you cannot see from below).  Sierra South tells you to turn South (right) off the trail just below some granite ledges.  These were fairly easy to identify – about 20ft high vertical slabs.  There are some cairns if you turn off here.

From this point, DO NOT FOLLOW ANY MORE CAIRNS.  There is a trail of cairns leading to absolutely nowhere up the slope.  We followed those damn cairns, which were hard to find, all the way up to about 12,300ft.  The intention was to climb up to the elevation of the saddle, then make our way around the rim of the bowl and over to the saddle itself.  This is not possible, or at least not possible in any reasonable amount of time.

Instead, once you turn off the trail below the granite ledges, start heading further south.  You can gain a little bit of elevation, but your target at this point is to aim directly for the pass.  The bowl has two drainages, separated by a nose in the middle.  The Italy Pass trail follows the Northern (left) drainage.  You need to get into the Southern (right) drainage.  After you exit the trail about 50ft below the ledges, keep heading south at near constant elevation, over a nose into the South drainage.

Now, you should be at a relatively flat spot in the Southern drainage.  If you’re above the flat spot, go down to it.  If you don’t see a flat spot, keep going up and over.

Now look at the saddle.  There are two clear features leading up to it: a vertical indentation (likely a drainage), and an angled indentation, which goes from upper left to lower right as you look at the saddle.  Aim for the angled indentation.  Once you get onto this slope, the going isn’t too bad, and you can pick your way up to the saddle relatively quickly.

Saddle1

The saddle as viewed from the top of the false cairn trail.  45-degree cut is visible to the left of the shadow on right side of the pic.  Flat area for crossing drainage at lower right of pic.

Pass to Vee Lake Map 1

The CORRECT route to get from the saddle to Vee Lake

At the far side of the long saddle lies the prize.  The view of Bear Lakes and the surrounding area is so spectacular and unexpected, we all stopped and stared.  The labor of the last 8 hours was forgotten, worry about the quickly failing daylight was put on hold, and we just took it in (and took some pictures as well).  The view from here is one of the best I have ever seen.

Going from the saddle to Vee Lake is a pretty easy affair.  The initial drop-off to White Bear Lake is steep, sandy, and loose.  Beyond that, the terrain is quite easy.  Just make the correct turns as indicated by the map – stay to the right (North) of White Bear, right (North) of Big Bear, left (South) of LIttle Bear, and then every time you hit a fork in the road, go left until you get the Vee Lake.  It’s mostly down, but there is a slight incline in the cleft on the way from Little Bear to Vee.  It looks enticing to follow Little Bear’s drainage downhill to the right (North), but that is a road to nowhere.

Initially I was worried about the approach into Vee Lake, since the topo shows a pretty steep grade from the trail into the lake, but it’s nothing to be worried about.  Easy picking down to the lake.

Vee Lake itself is another amazing place.  It is a more personal version of Lake Italy.  Where Italy is craggy and foreboding, Vee is inviting.  There are great campsites just up the shore, and the scree isn’t too densely packed.  And of course, we had the place to ourselves.  I’d bet Vee doesn’t see more than a handful of visitors a month.  It looks like the surface of the moon, and you know you’re pretty far off the beaten path in that place.

Day 3: Vee Lake to Bear Creek/JMT (7.5mi, 2,400ft descent)

Vee_View1

The surreal view Northeast from our campsite at Vee Lake

KristenLaurel_VeeLake2

Kristen and Laurel gathering water at Vee

KristenVicky_BelowVeeLake1

Kristen and Vicky on the descent from Vee Lake.  Seven Gables peak in the background

We had planned at layover day at Vee Lake, either for day hiking or just lounging around.  Certainly we deserved it after the feat the day before.

However, a few things conspired to cut our stay at Vee short.  Due to the nearby fire in Sequoia NP, a thick cloud of smoke descended into the basin around 2-3am, and Kristen’s lungs were burning.  It luckily blew out by 5-6am, but we didn’t want to chance it again.  Plus, we were all too fatigued from the effort of the previous day to want to day hike.

So our compromise was: take a leisurely morning, leave camp at noon, and enjoy the theoretically easy ~7 miles downhill to the JMT and beyond.

We succeeded in taking a leisurely morning.  In fact it was really nice to hang out and drink a second cup of coffee in the spectacular Vee Lake basin.

The trip out, however, was not as expected.  Within 10 minutes, we were descending a steep, scree-filled gully down to the Seven Gables Lakes.  From that point on, there really was no consistent trail to speak of until we hit the JMT.  It was a patchwork of random cairns (which we no longer trusted), random tree blazes, and lots of scree.  The going was again slow, though the Seven Gables drainage was gorgeous – a wide, meandering river through a granite gorge, with views of the surrounding peaks the whole way.  The key to descending this river valley is to make sure you’re on the proper side of the river.  I think we crossed that river a dozen times throughout the day.  We’d keep going until it became clear we’d run out of reasonable trail, and then we’d either cross or backtrack until we could cross.

By the time we hit the JMT, it was probably 4pm, and we were thrilled to be on such an easy trail.  We did a good pace all the way to the Bear Creek turnoff, probably 3-4mph average.  The well-maintained trail felt almost laughably straightforward after the previous few days.  We made great time, and got to camp with plenty of daylight to play around at the river and cook a big dinner.

Day 4: Bear Creek to Bear Diversion Dam (6.5mi, 1,400ft descent)

Kristen_Vicky_BearCreek1

Kristen and Vicky on Bear Creek

Group_TripEnd1

The whole group after finishing the trip

The last day was more or less a victory lap.  6.5 miles of pretty easy trail, mostly downhill.  We were out of camp by 9:30, and at the dam by noon.  We met up in Fresno for our habitual In-n-Out burger stop, where Kristen ate only one double-double.

It was a fantastic trip.  The views on this trip were as good as any we’ve ever had, particularly the view from the saddle into the Bear Lakes.

We learned a lot about cross-country navigation, and route planning to take into account terrain.  The going was shockingly slow on this trip, and I am grateful that all four of us have very good fitness.  In fact, I think it was our fitness that gave us the margin for error that permitted us to finish day 2 .  I bet we lost 4 hours that day to mistakes, which could be potentially devastating at that altitude.  But we came out of it stronger and smarter than ever, and we’re already planning our big trip for next year!